Lab 1: Build and Deploy a Sample Application
Purpose
In this lab, the student will build and deploy their first sample application, then copy the files from this sample application into their own project directory, making a skeleton ZephyrOS project that will be used for the rest of these labs.
Overview
This lab will begin by opening VSCode and a terminal pane. You will then initiate your Python Virtual Environment (VENV) and use this terminal to issue “west” commands to build and flash code to your SAM E54 Xplained Pro device. You will also open a second terminal window and use SerialMonitor to view serial output from your device.
Procedure
Step 1.1: Build a sample application using west
1.1.1: Launch a VSCode window by clicking on the VSCode icon or by changing directory to your project directory and typing:
- Ubuntu
- macOS
- Windows
$ cd ~/zephyrproject
$ code .
$ cd ~/zephyrproject
$ code .
PS C:\Users\[UserID]> cd zephyrproject
PS C:\Users\[UserID]\zephyrproject> code .
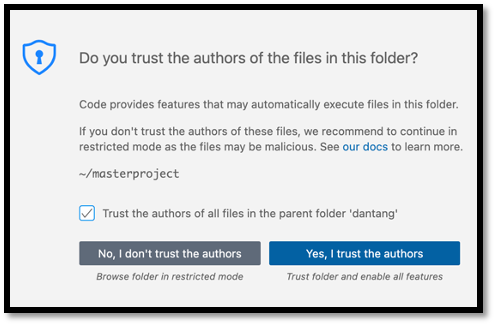
1.1.2: Opening VSCode will result in a confirmation window asking you to trust the folder, choose the button labeled “Yes, I trust the authors”
1.1.3: When VSCode is loaded, enable autosave by navigating to File → AutoSave
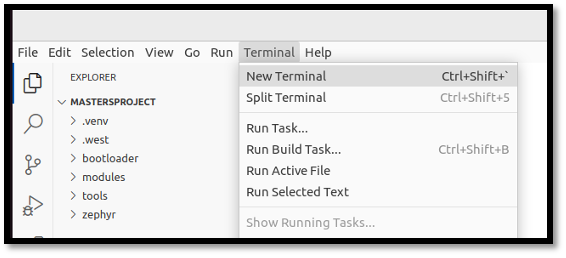
1.1.4: Open a terminal pane in VSCode by navigating to Terminal → New Terminal
1.1.5: The west tool is a Python executable that can be installed globally on a system, or locally within a Python Virtual Environment (venv). Our West install is in one such venv. Each time a new terminal window is opened, the environment should be sourced with the following command:
- Ubuntu
- macOS
- Windows
$ source ~/zephyrproject/.venv/bin/activate
When complete, your terminal prompt will include the name of your virtual environment:
(.venv) $ .
$ source ~/zephyrproject/.venv/bin/activate
When complete, your terminal prompt will include the name of your virtual environment:
(.venv) $ .
PS C:\Users\[UserID]\zephyrproject> .\.venv\Scripts\Activate.ps1
When complete, your terminal prompt will include the name of your virtual environment:
(.venv) PS C:\Users\[UserID]\zephyrproject> .
You can learn more about Python Virtual Environments here: docs.python.org/3/tutorial/venv.html
1.1.6: From within your terminal (and .venv), build your first sample project targeting the SAM E54 Xplained Pro board:
- Ubuntu
- macOS
- Windows
(.venv) $ west build -p always -b same54_xpro zephyr/samples/basic/blinky
(.venv) $ west build -p always -b same54_xpro zephyr/samples/basic/blinky
(.venv) PS C:\Users\[UserID]\zephyrproject> west build -p always -b same54_xpro zephyr\samples\basic\blinky
Observe the output and success messages from your build, which may resemble the following:

Step 1.2: Flash the sample application to your target device using west
1.2.1: To flash your SAM E54 Xplained Pro board with the compiled code, connect your board with your USB cable connected to the "Debug USB" port of your target, allow your Operating System to find and mount the device, then type:
- Ubuntu
- macOS
- Windows
(.venv) $ west flash
(.venv) $ west flash
(.venv) PS C:\...\zephyrproject> west flash
The device is now programmed and LED0 should be flashing at a rate of 1Hz.
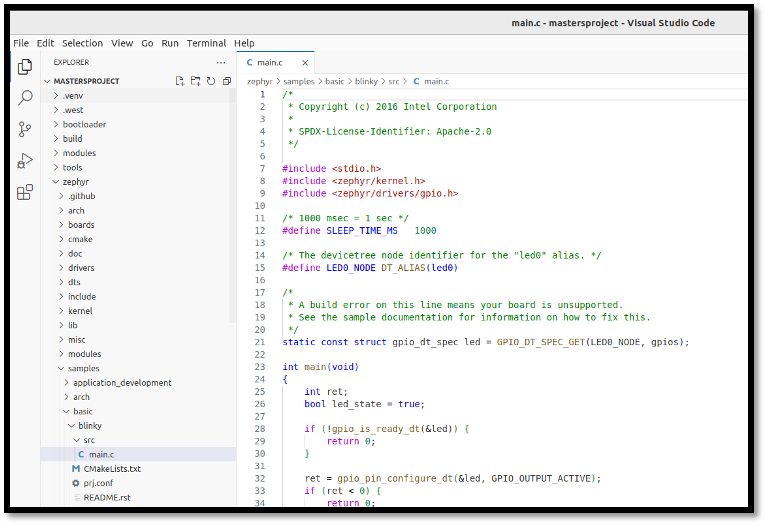
1.2.2: Observe the code of the sample application by using the VSCode Navigation pane to expand zephyr/samples/basic/blinky/src and opening main.c in the main panel. Many of these code elements will be discussed within the remainder of this course.
Step 1.3: Populate a new project tree, then build and deploy your custom project
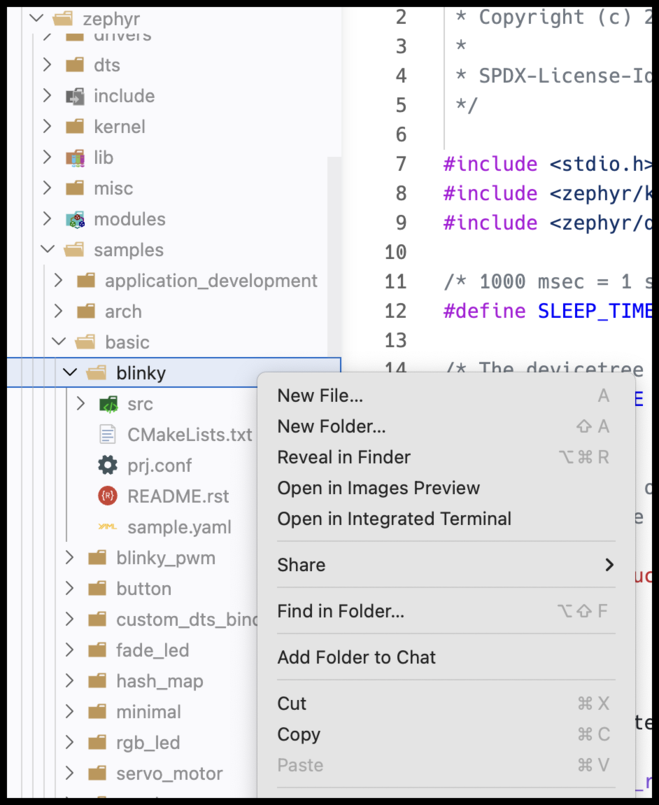
1.3.1: It is often easiest to use collateral from a sample project to begin creating your own project. Right-Click/Copy the blinky folder from this sample project and paste them to the root of the project. Then, rename the folder you just pasted to application You can delete the README.rst and sample.yml files.
You can also use your terminal window and run the following commands:
- Ubuntu
- macOS
- Windows
(.venv) $ cp -r zephyr/samples/blinky application
(.venv) $ cp -r zephyr/samples/blinky application
(.venv) PS C:\...\zephyrproject> Copy-Item -Recurse zephyr\samples\basic\blinky application
Your folder structure should now look like this:
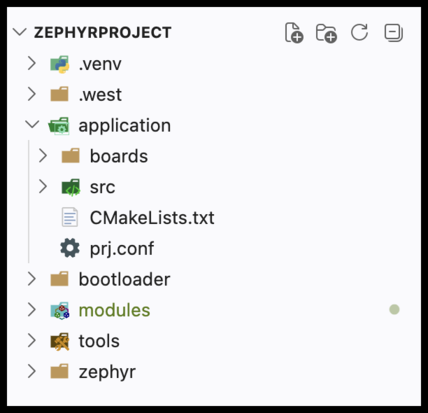
When working on your own projects, you can structure your working directory however you want. For this class, we will assume that your application code is in application/.
1.3.2: Build this Blinky code in its new location:
- Ubuntu
- macOS
- Windows
(.venv) $ west build -p always -b same54_xpro application
(.venv) $ west build -p always -b same54_xpro application
(.venv) PS C:\...\zephyrproject> west build -p always -b same54_xpro application
1.3.3: Close any existing VSCode tabs for main.c, then reopen main.c from ./application/src/. Edit the blink time in main.c to change the sleep time between blinks:
src/main.c Line 12:
#define SLEEP_TIME_MS 500
1.3.4: Rebuild your code with the custom changes included. If you do not need a clean build and your target options haven't changed since your last build, you can simply type:
- Ubuntu
- macOS
- Windows
(.venv) $ west build
(.venv) $ west build
(.venv) PS C:\...\zephyrproject> west build
You can skip the full west build -p always… command for incremental builds. West is generally
smart enough to detect code changes and recompile as necessary before flashing. If newly added
code doesn't seem to be running as intended, try a pristine build again.
1.3.5: Flash this newly built code to your SAM E54 Xplained Pro device and observe the new blink frequency:
- Ubuntu
- macOS
- Windows
(.venv) $ west flash
(.venv) $ west flash
(.venv) PS C:\...\zephyrproject> west flash
You can use the up arrow key to cycle through old commands you've run. This way, you don't have to type the commands each time.
1.3.6: In a new terminal window (Terminal → New Terminal), select the "SERIAL MONITOR" tab and connect to the serial port (Start Monitoring) of the device (EDBG Virtual COM Port) to see print statements from our main() loop.

Results
Congratulations! You have successfully built and flashed your first Zephyr projects!
Summary
This lab introduced you to VSCode, west, the Zephyr sample application repository, and SerialMonitor - these are all of the tools you'll need to use for the rest of these labs.